
How to bulk update videos
If you need the same player styling or the same sharing rules across a lot of videos, you do not have to open them one by one. Select what you want to change in your library and use the action bar at the bottom of the screen.
There are two bulk updates covered here:
- Appearance, which copies the look of the player and its controls from one video onto the rest
- Sharing, which sets visibility, embedding, domain restrictions and the watch page
Selecting videos and folders
Tick the checkbox on any video or folder card. You can also use the Folders and Videos checkboxes at the top of each group to select everything in that group at once.
Selecting a folder selects every video inside it. You do not need to open the folder first.
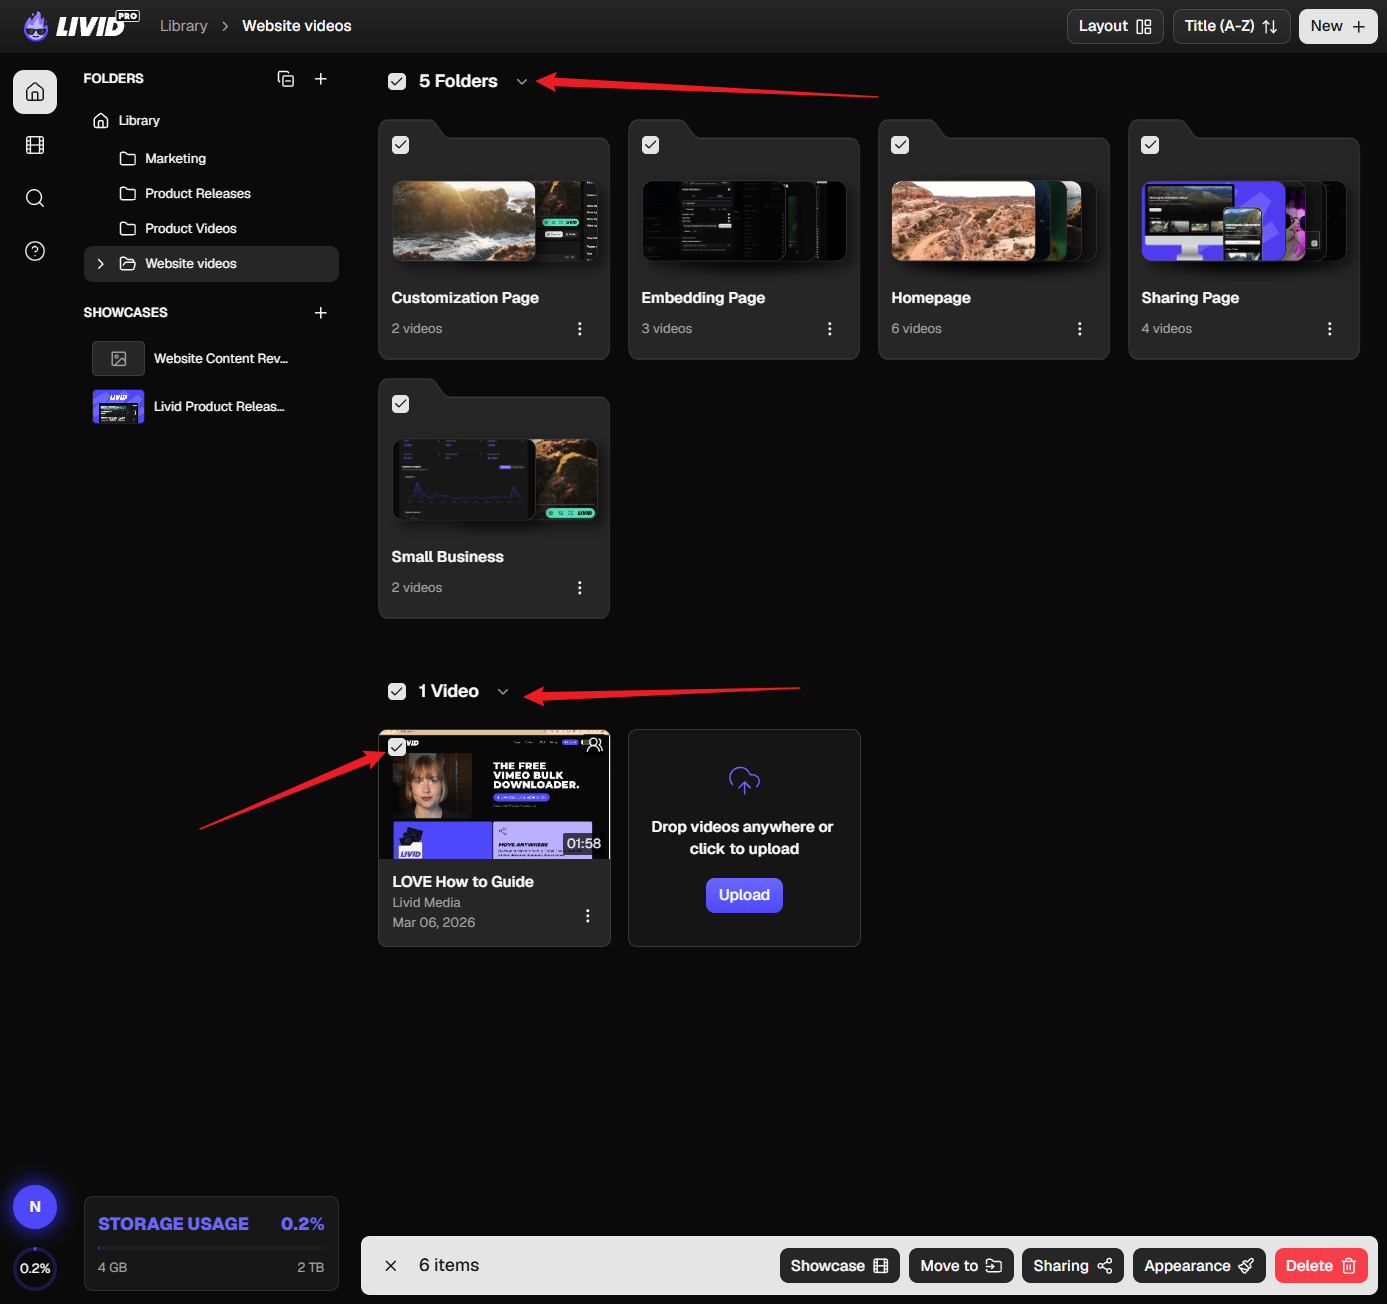
Once anything is selected, the action bar appears at the bottom of the screen with the number of items you have selected and your options: Showcase , Move to , Sharing , Appearance and Delete .
Part 1: bulk update appearance
This copies the full appearance of one template video onto every video you have selected. That includes:
- Branding: buttons colour, accent colour, icon and text colour, background colour, and your custom logo
- Play button position
- Every player control: title, progress bar, play time, volume, CC and subtitles, quality, speed, Chromecast, Airplay, picture in picture, full screen, the Livid logo and share
It is all or nothing. There is no way to copy some of these settings and leave the rest alone.
Step 1: set up your template video
Open the video you want to use as your template, go to the Appearance tab, and set it up exactly as you want every other video to look.
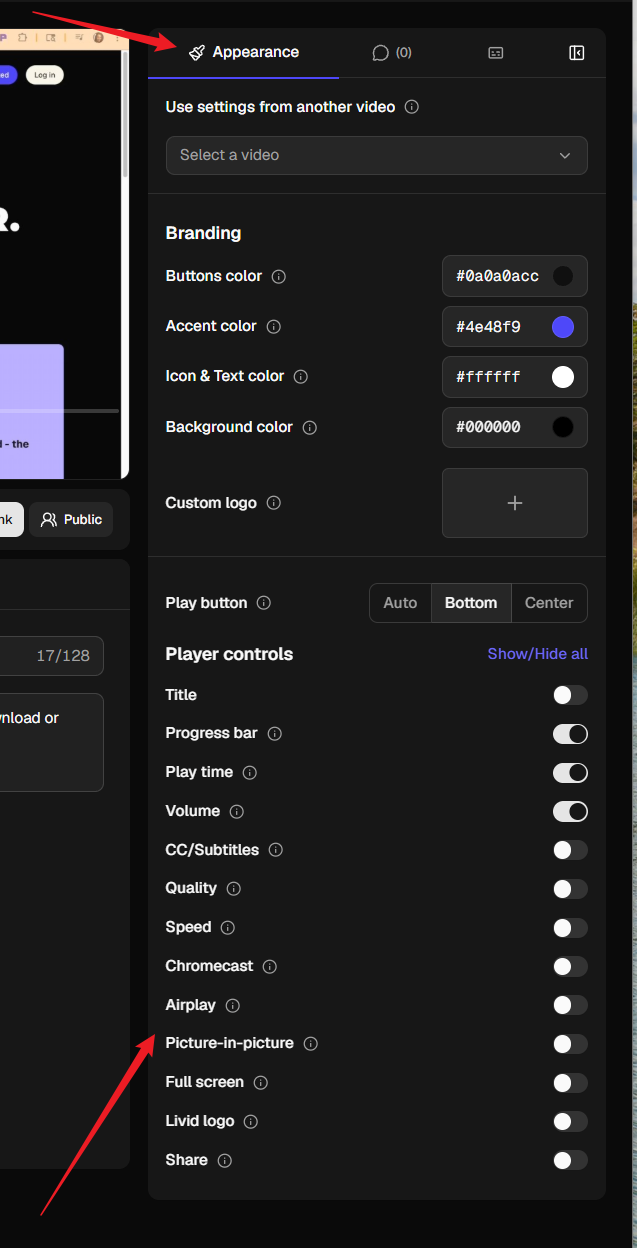
Take your time here. Every video you select later takes its appearance from this one, so it is worth getting right before you apply it to a hundred others.
Step 2: select the videos you want to change
Back in your library, select the folders and videos you want to update.
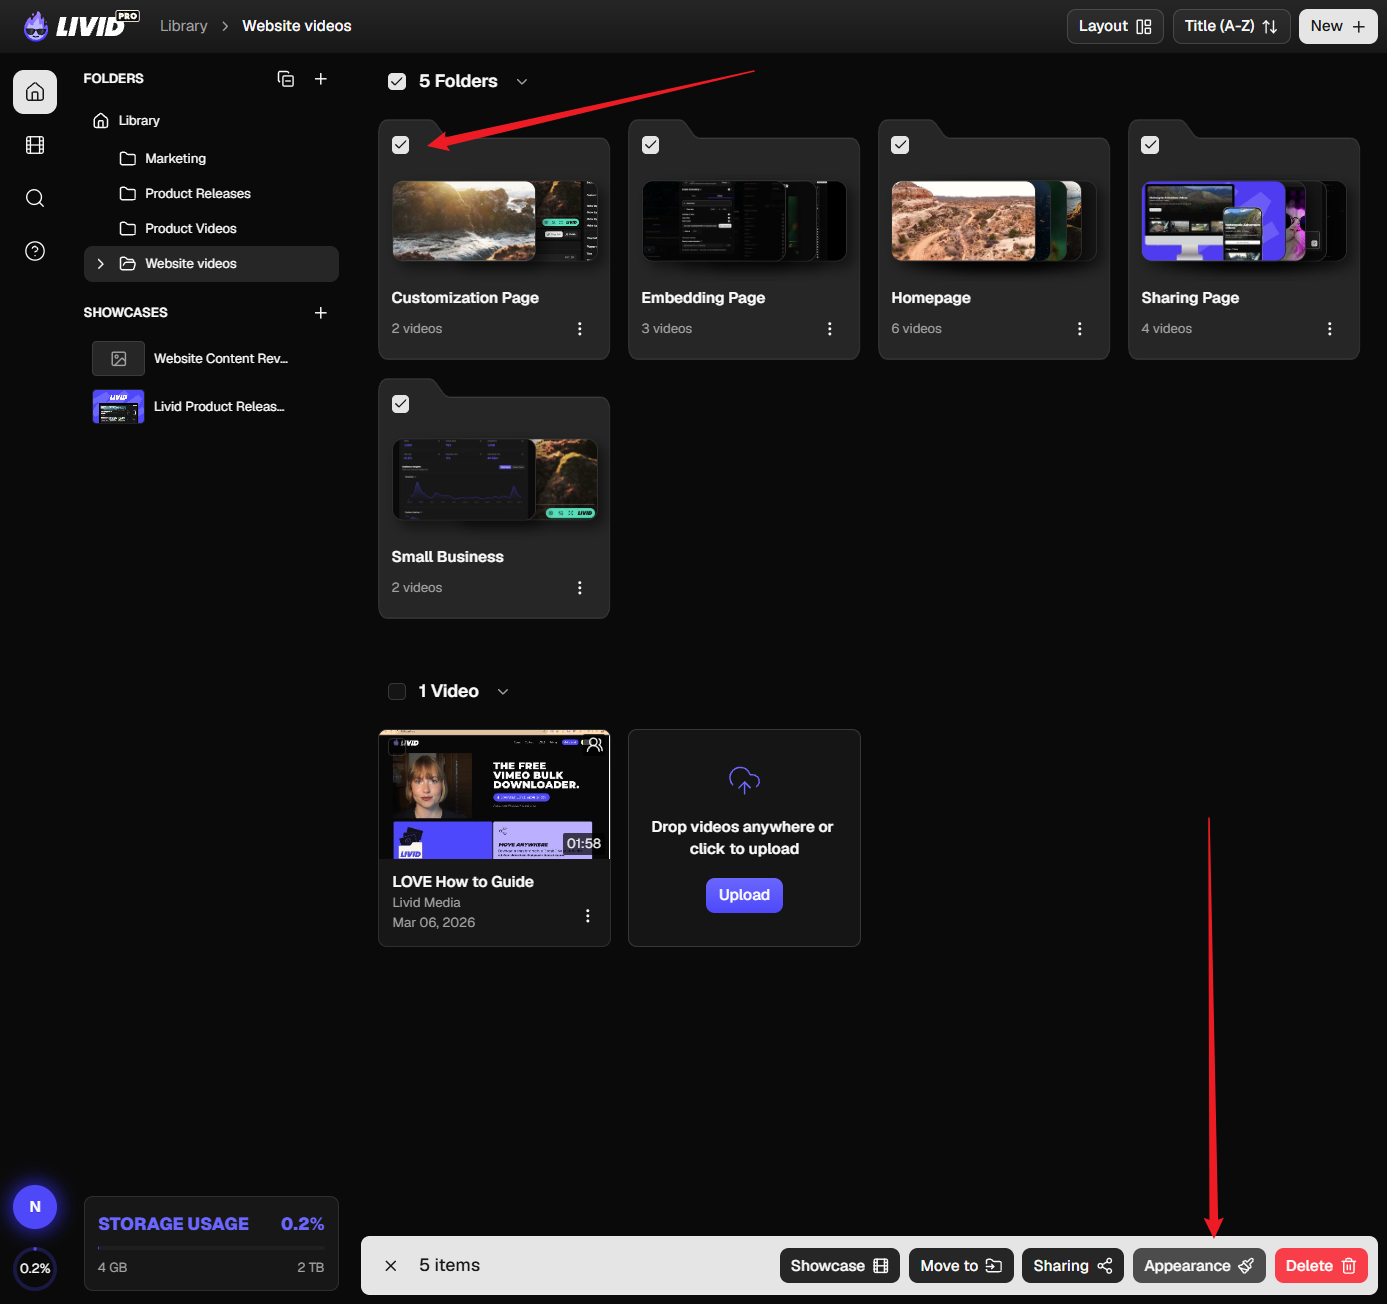
Step 3: choose Appearance
Click Appearance in the action bar at the bottom.
Step 4: pick your template video
The Customize player appearance window opens. Under Which video do you wish to use as the template? , choose the video you set up in step 1.
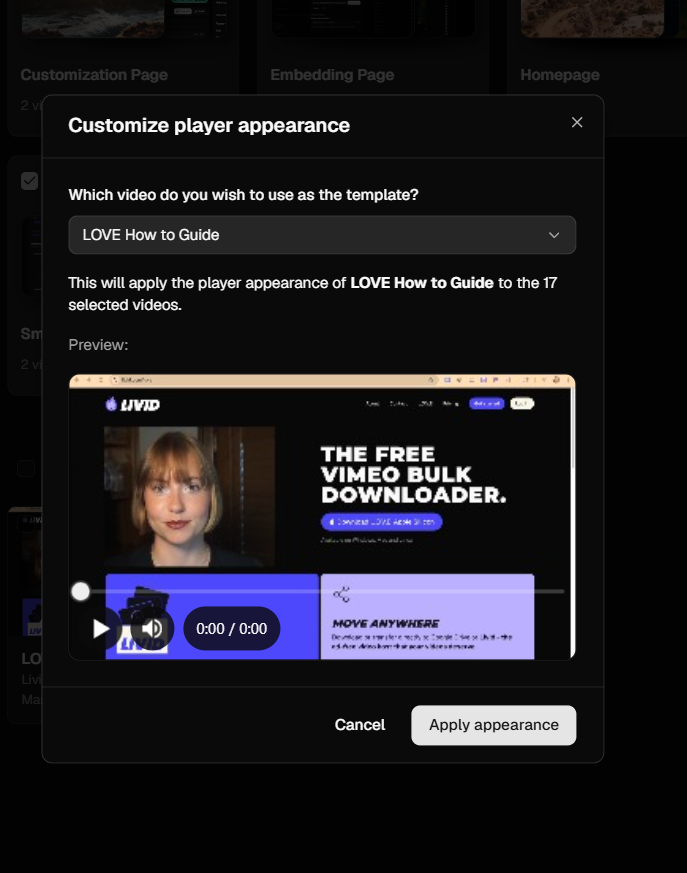
Two things confirm you have the right one. The line underneath names your template video and how many videos it is about to change, and a preview of the player appears below it.
Step 5: apply
Click Apply appearance . Every selected video now matches your template.
Part 2: bulk update sharing and visibility
⚠️ Anything you set here overwrites the existing settings on every video you have selected. There is no undo, so check your selection before you save.
This one sets:
- Visibility
- Whether embedding is enabled
- Which domains your videos can be embedded on
- Whether the watch page is disabled
Before you start: visibility applies to everything
Visibility has to be set first, and whatever you choose applies to every video in your selection.
This matters even when visibility is not what you came to change. If you want to add a domain restriction to twenty videos, those twenty videos will all end up with the same visibility, whether that is unlisted, public or password protected.
So group your selection by the visibility you want. If half your videos should be public and half unlisted, do it in two passes rather than one.
Step 1: select your videos
Select the videos and folders you want to update, then click Sharing in the action bar.
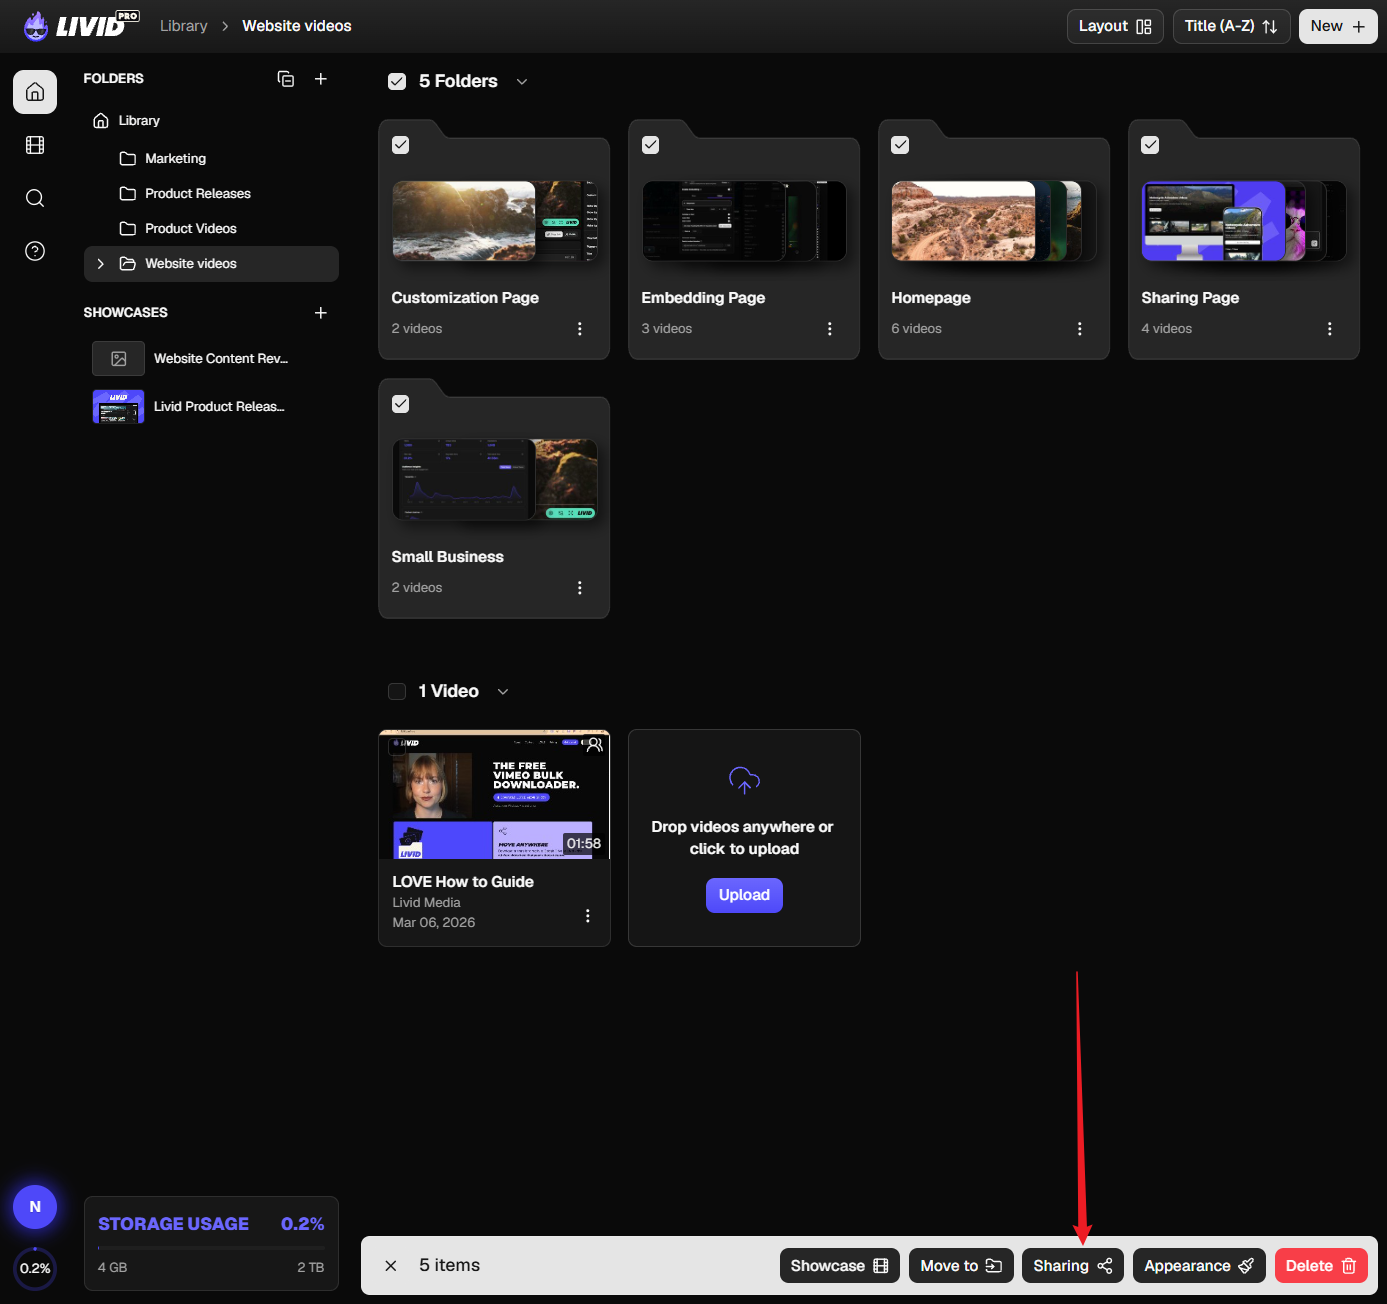
The modal header confirms how many videos you are about to change.
Step 2: set the visibility
Click on Select a privacy option and pick the visibility for the whole selection.
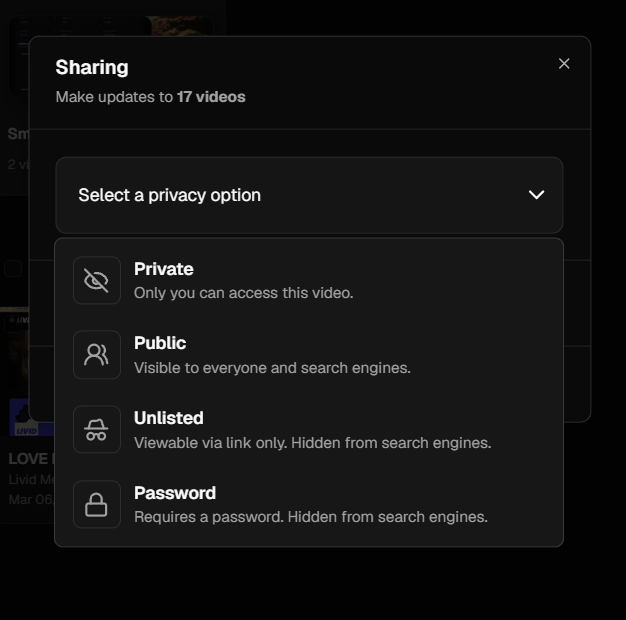
If you choose Private , embedding is turned off for every video in the selection. Private videos cannot be embedded, so the rest of the options below stop applying. Choose one of the other visibilities if these videos need to stay on your site.
Step 3: set embedding
Turn Enable Embedding on or off.
Step 4: restrict embed domains
Open Advanced settings and add the domains your videos are allowed to be embedded on. Enter one at a time and click Add .
You can use a wildcard to cover subdomains, for example *.mysite.org .
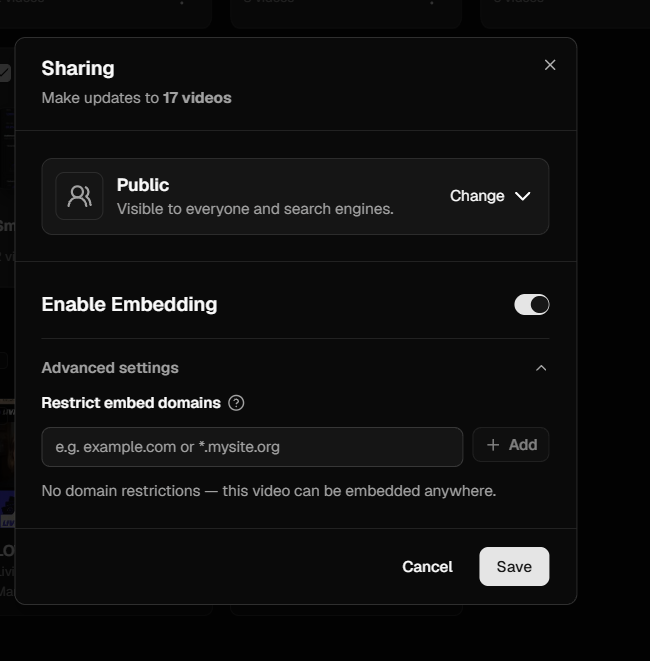
More detail on how this works is in Restricting domain access on your videos.
Step 5: disable the watch page if you need to
Disable watch page only appears once you have added at least one domain restriction. If you cannot see it, add a domain first.
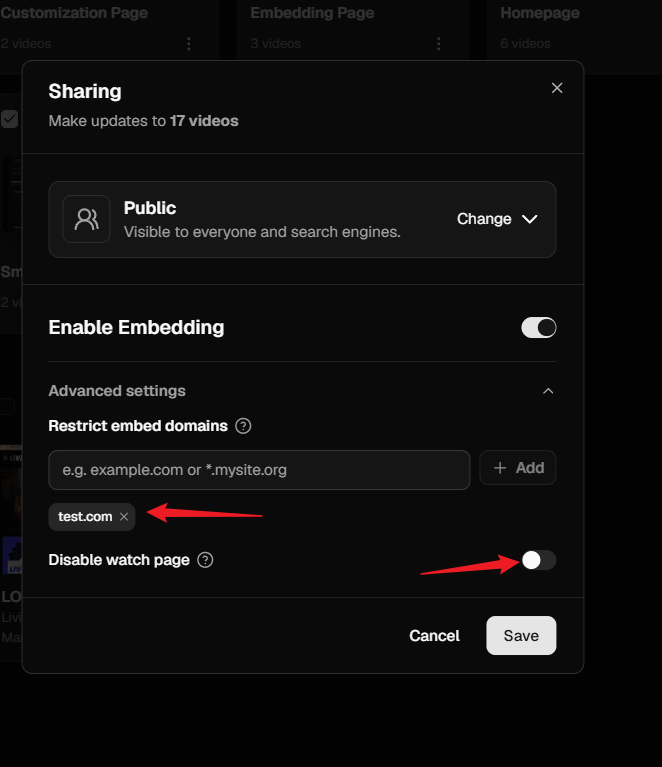
Step 6: save
Click Save to apply everything to the selection.
Setting defaults for future uploads
Bulk updates fix videos you have already uploaded. If you want new uploads to arrive with the right settings in the first place, set your defaults instead.
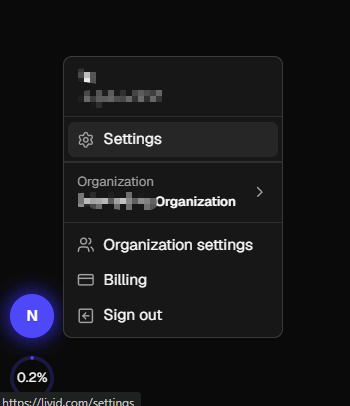
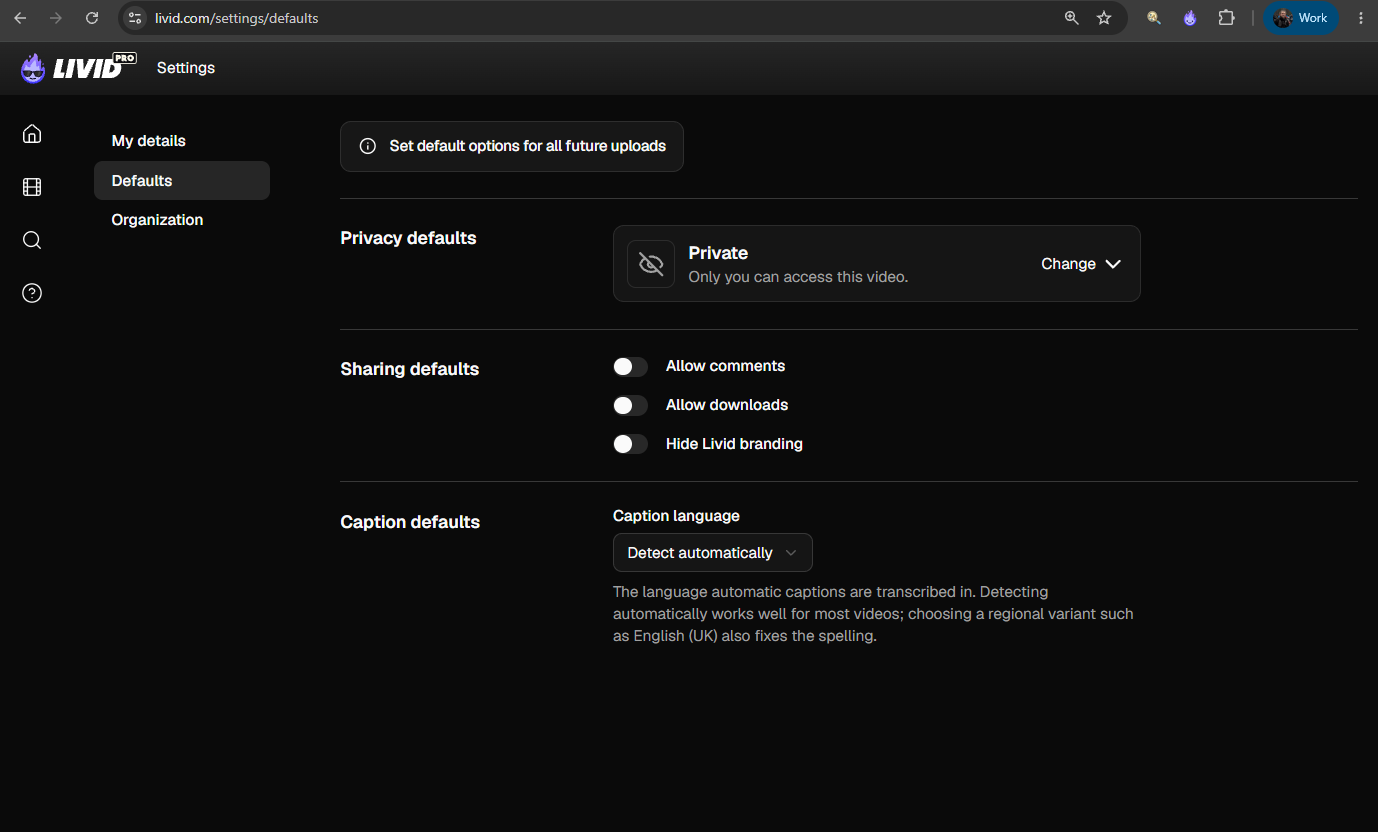
Click your avatar in the bottom left corner and choose Settings , then open the Defaults tab.
From here you can set:
- Privacy defaults, the visibility every new upload starts with
- Sharing defaults, whether comments, downloads and Livid branding are on
- Caption defaults, the language automatic captions are transcribed in
These apply to future uploads only. Changing a default does nothing to videos already in your library, so if you want your existing videos changed too, use the bulk updates above as well.
On captions, Detect automatically works well for most videos. Choosing a regional variant such as English (UK) also fixes the spelling.
👉 More default options are on the way, including appearance templates that let new uploads pick up your player styling automatically.
Frequently asked questions
Can I copy just the colours and leave the player controls alone? No. The appearance update copies the whole appearance of the template video. If you only want to change one thing across a lot of videos, set that one thing on your template video, apply it, then be aware that the rest of the appearance comes with it.
What happens to videos that already had different settings? They are overwritten. Both bulk updates replace what was there rather than merging with it.
Does selecting a folder update the videos inside it? Yes. The count shown in the action bar and in the sharing modal tells you how many videos will actually change.
I only want to change embed domains, not visibility. You still have to set a visibility, because it applies to the whole selection. Split your videos into batches that should share the same visibility and run the update once per batch.
I cannot find Disable watch page. It only shows once a domain restriction has been added.
My embeds stopped working after a bulk sharing update. Check the visibility you applied. Setting a selection to Private turns embedding off, and private videos cannot be embedded anywhere. Set them back to unlisted, public or password protected and re-enable embedding.
Can I undo a bulk update? No. Check your selection and your settings before you apply.
Do I have to do this every time I upload? No. Set your privacy and sharing defaults under Settings and every new upload starts with them applied. Existing videos are not affected, so those still need a bulk update.